
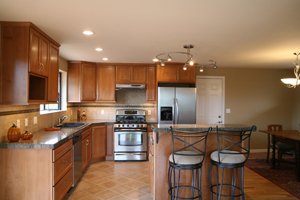
 Kitchens are the centers of people’s houses. It’s in this room that families bond over meals and spend time before going off to work and school. Updating your kitchen can make your days run smoother and increase the resale price of your property. If your cabinets are looking worn or you simply need a change, you don’t have to go to the trouble and cost of replacing them entirely. Refacing can cost between 30-50% less than replacing your existing cabinets entirely. A simple way to brighten your kitchen and make it look more updated is to reface. Refacing can completely transform an old set of cabinets into a lively addition to your home. We’ll give you tips about what building materials to pick up and what steps to take to ensure that your DIY cabinet refacing goes well and ends with a beautiful finished product.
Preparations and Getting Started
The first thing you’ll want to do is take an inventory of the supplies you already have and what you’ll need to pick up from a builders supply. You will also want to make sure that your cabinets are good candidates to be refaced. If your cabinets are warped, not structurally sound, or have water damage, they should probably not be refaced. Clean out your cabinets and inspect the sides and fronts. Any strange rippling in the wood or other significant issues should be cause for serious concern. Refacing is an investment, so if the cabinet structure is simply going to fall apart after a couple of years, you’d be better off replacing the units themselves.
Determine whether you want to reface with a plastic laminate, which will come in a variety of colors and patterns, or a wood veneer. The number of natural and artificial facings are nearly limitless. If you go to a retailer and can’t find something you absolutely love, you should keep looking until you get a product that will really satisfy your vision for your kitchen.
Priming the Wood and Sanding
The next step is to clear the work space. You will want to remove hardware like hinges, knobs, and screws. Make sure that the cabinets are cleaned. You can fill a bucket with warm water and some dish soap and then clean them off with a rag or sponge. Make sure that they are dried completely either by air or with paper towels.
Next, get some sand paper and rough up the existing faces of the cabinets. This will help them be primed for the new face’s glue to stick. Next, take carpenter’s glue and cover the back of the new face you’ll be putting on. Veneers are very thin. They are generally made out of plywood with a minute layer of whatever wood you are going to see. Make sure you use rulers to trim the new face veneers and overlap slightly so seems are not visible.
Completing the Project
To complete the project, put the hardware back on the drawers and cabinets. You will then hang the doors and hinges using a guide and accurate measurements. Although DIY projects might be intimidating, they pay off in the end and you’ll be proud of having done it yourself.
Leave a Reply